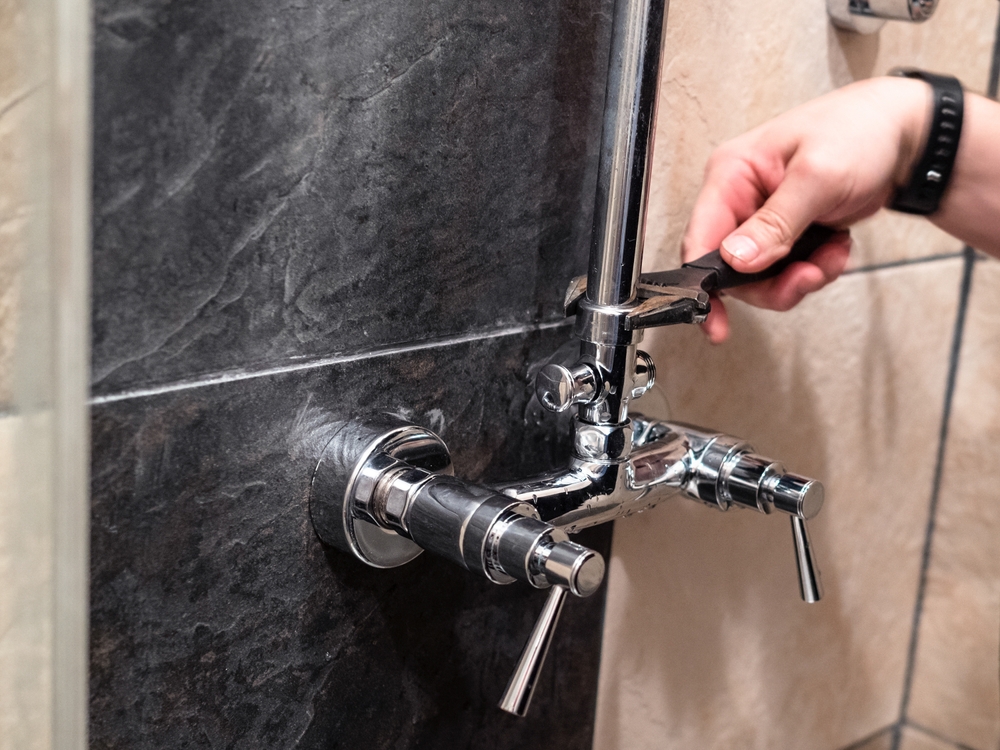
A shower valve is an important component of any bathroom plumbing as it regulates the flow and temperature of water to the shower head. If you have a problem with your shower valve, it can be a major inconvenience.
A shower valve that is not working properly can be a major inconvenience. Not only is it frustrating to deal with, but it can also lead to costly repairs. Fortunately, there are some easy steps you can follow to repair your shower valve yourself. With a little patience and the right tools, you can get your shower back up and running in no time!
What does the shower valve do?
The shower valve is a shutoff valve that controls the flow of water to the showerhead. It is usually located behind the showerhead or in the wall near the showerhead. The shower valve allows you to turn the water on and off, as well as control the temperature of the water.
Signs your shower valve needs a repair
If your shower valve is not installed properly, it can cause a number of problems. The most common problem is that the water pressure will be too low or too high. For instance, if the water pressure is too low, it may not be possible to get the water hot enough for a comfortable shower. This can make it difficult to take a shower, and can also lead to leaks.
Another problem that can occur is that the water temperature will be unstable. This can be dangerous, as you may suddenly find yourself in a scalding hot shower. If the water is not as hot as it used to be, or if it fluctuates between hot and cold, the valve may need to be replaced.
In addition, listen for any strange noises coming from the valve. If you hear any hissing or dripping, it’s time for shower valve repair.
Additionally, improperly installed shower valves can cause water to back up into your home’s plumbing system. This can lead to serious problems, such as flooding.
If you are unsure of whether your shower valve is installed properly, it is important to call a plumber right away. A professional plumber will be able to quickly inspect the valve, identify the problem and correct it, preventing further damage to your home’s plumbing system.
Types of shower valves
Before you embark on the project of repairing the shower valve, it is important to know what type of shower valve your shower has.
There are several types of shower valves, each with its own benefits and drawbacks.
Single handle valves
The most common type of shower valve is the single-handle variety. These valves have a single handle that controls both the hot and cold water flow. While they are easy to use, they can be difficult to repair if something goes wrong.
Dual handle valves
The next most common type of shower valve is the dual handle variety. As the name suggests, these valves have two handles, one for hot water and one for cold water. This allows for more precise control over the temperature of the water flowing through the valve. However, these valves can also be more difficult to repair than single-handle valves.
Pressure balancing valves
These shower valves balance the water pressure automatically between cold and hot water.
The valve detects water pressure changes as the water passes through diaphragms and pistons from both the cold and hot water lines. It then controls one side to ensure a steady water temperature.
Thermostatic valves
Another type of shower valve is the thermostatic valve. These valves are designed to maintain a consistent water temperature, even if the water pressure changes. This makes them ideal for households with children or elderly members who might be sensitive to sudden changes in temperature.
These shower valves have two handles and two valves to control temperature and pressure. This allows you to control temperature without the water volume getting affected and vice versa.
These valves are able to sense water temperature with the help of a thermosensitive element such as a wax insert. This element contracts or expands to control the water when the required heat is reached.
You can preset the temperature on the shower valve to directly control the water temperature.
However, thermostatic valves can be more expensive than other types of valves and may require professional installation and repair.
Shower mixing valves
These types of valves are typically found in older homes and manually mix hot and cold water before the water reaches the showerhead.
This type of valve does not regulate the water pressure and carries a high risk of scalding when there is a drop in cold water pressure.
Compression valves
Compression valves are the most common type of valve and are usually found in older homes. These valves have two handles that control the flow of water by compressing a rubber washer against a metal seat.
Cartridges
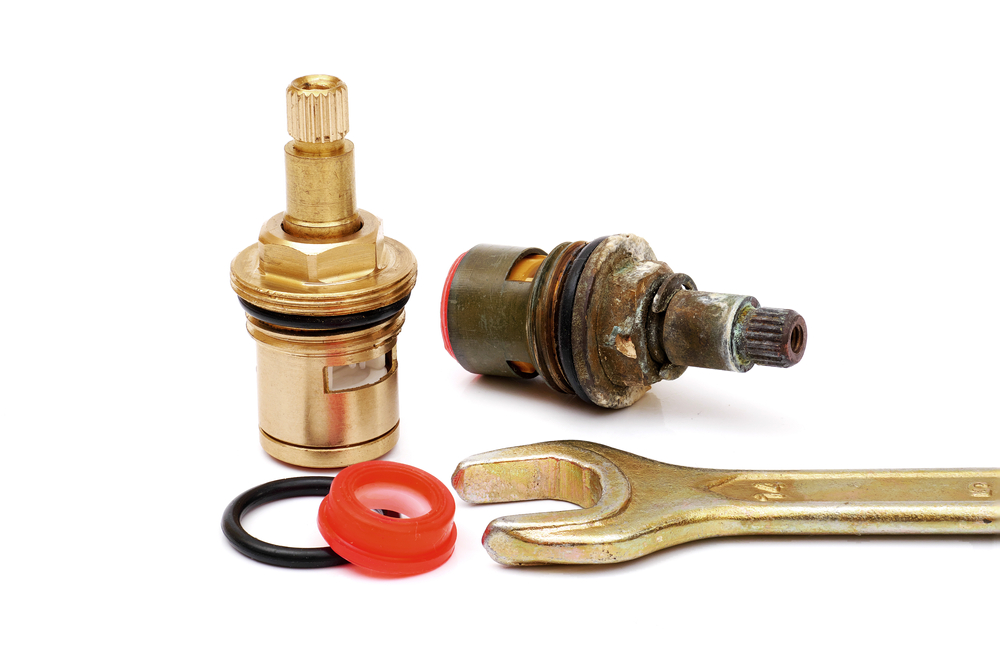
Cartridge valves are newer than compression valves and are becoming more popular in modern homes. These valves have a single handle that controls the flow of water by moving a cartridge up and down.
Ball valves
Ball valves are the least common type of valve but are growing in popularity due to their simplicity. These valves have a single handle that controls the flow of water by turning a ball inside the valve.
Common shower valve issues
-Leaking: One of the most common issues with shower valves is a leaking problem. If your shower valve is leaking, it is important to identify the source of the leak and have it repaired as soon as possible.
-Corrosion: Over time, the metal components of your shower valve can become corroded, which can lead to leaks and other problems. If you notice any corrosion on your shower valve, it is important to have it repaired or replaced.
-Faulty Seals: Another common issue with shower valves is a faulty seal. Over time, the seals around the valve can become worn or damaged, which can allow water to leak out. If you notice a problem with your seals, it is important to have them replaced as soon as possible.
-Limescale and debris: These can lead to a faster wearing out of the shower valve. If the limescale is not extensive, cleaning the valve and shower handle can solve your problem.
At times, however, the limescale can damage the cartridge which requires a replacement.
Steps to take for shower valve repair
If you are planning on repairing your shower valve, it is important to do so well in advance and to shut off the main water supply. This will ensure that you have plenty of time to complete the repair and that your home is not at risk of flooding.
Gather the tools
When you are ready to begin the repair, make sure that you have all of the necessary tools and materials on hand.
There are a few different tools that you will need in order to replace your shower valve. You will need a wrench to remove the old valve, a screwdriver to remove the old valve stem, and a new valve stem. You may also need some pliers to help with the installation of the new valve.
In addition to the new shower valve, be sure to gather these tools:
- Screwdriver
- Utility knife
- Allen-wrench
- Pliers
You may also need PEX tubing based on your shower setup. At this point, you may also want to install other bathroom plumbing components such as a trim plate or shower head.
Shut off the main water supply
Once you have gathered everything you need, turn off the water to your home at the main shutoff valve. This will prevent any water from entering your home while you are working on the repair.
Choose the right type of shower valve
When it comes time to repair or replace your shower valve, it is important to choose the right type of valve for your needs.
No matter which type of valve you choose, it is important to make sure that it is compatible with your shower fixtures and piping. You should also make sure that you follow all instructions carefully when installing or repairing your shower valve.
Cover the drain and showerhead
Make sure that the drain is covered with a rubber stopper or similar material in order to keep water from seeping through.
Next, cover the shower head with a towel or cloth; this will prevent water from spraying out and causing damage.
Also, cover the entire shower valve with a plastic bag or sheet; this will ensure that no water gets into the inner workings of the valve and causes corrosion.
Unscrew the handle of the shower
Unscrewing the shower handle is a simple process that can be done in a few minutes. First, locate the screw that holds the handle in place. This is usually located under the cap of the handle. Use a screwdriver to remove the screw. Once the screw is removed, you will be able to pull the handle off of the valve stem.
Next, take a look at the O-ring on the back of the handle. This ring helps to create a watertight seal between the valve and handle. If this ring is damaged or missing, it will need to be replaced before reassembling the valve.
Once you have inspected (and possibly replaced) the O-ring, you can begin putting everything back together. Screw the handle back onto the valve stem and tighten it in place with the Phillips head screwdriver.
If your shower valve still leaks after this, it is likely that there is a more serious problem with the valve or the faucet. You will need to call an emergency plumber for assistance.
Remove the trim plate
To remove the escutcheon trim plate, first, unscrew the set screw in the center of the plate. Then, using a flathead screwdriver, pry off the plate. Be careful not to damage the finish on your shower valve. If the set screw is difficult to remove, you may need to use a power drill.
Cut a hole to gain access to the valve
Once the trim plate is removed, a small opening should become visible in the wall. You may need to expand the opening if it is not 12 x 12 inches in size.
If you are not confident about this step, it is better to call a professional plumber.
Take out the valve clip
This can be done by unscrewing the retaining screw with a screwdriver. Once the screw is removed, you can pull the valve clip off of the shower valve.
Some showers have a retainer nut instead of a metal clip to hold the shower valve in place. Use a wrench to unscrew the nut while holding the valve.
Remove and replace the shower valve
Ensure the water is shut off and pull the valve out of the wall.
Once the old valve is removed, clean up any debris or grime that may be on the wall surface. This will help ensure a good seal when you install the new valve.
Now, it’s time to install the new valve. Start by attaching the new valve to the wall using the screws that came with it. Then, use your wrench to tighten down the retaining nuts until they’re snug against the wall.
Replace the shower handle and the trim plate.
Finally, turn on the water supply and test out your new shower valve!
If the problem has not been resolved, there may be another issue at play (such as a damaged washer). At this point, you may need to consult with a professional plumber to diagnose and resolve the problem.
When to call a professional plumber
If your DIY shower valve repair has not resolved the problem or if you are unsure about how to repair the valve, it’s important to call a professional plumber.
As a seasoned plumbing professional, we at San Diego Plumbing and Pipelining Company can help you troubleshoot the problem.
We have the tools and expertise required to determine whether you need a new valve or just a simple repair.
Contact us to know more about our services.


